There are numerous reasons why you’d want to leverage the following setup. However, I’m going to be using a trivial example of sharing some CSS styles across different Rails apps via an npm package. That npm package will be private and hosted on GitHub. After we install the package into our Rails project via Yarn, we’ll deploy to Heroku.
OVERVIEW
The concept is straightforward. We want to keep things DRY (don’t repeat yourself) by sharing bits of JavaScript and CSS code across multiple Rails apps. We’re going to do that with the use of an npm package. This gives us the ability to make updates to our files in one location (the package) and then tell each of our Rails apps to receive those updates with a yarn upgrade.
After our Rails apps have been updated we’ll deploy to Heroku. Heroku is really good about going out and grabbing public package from npm. However, our package is not on npm. And it’s not public. This means we need to do a few things to get Heroku to properly pull down our package and successfully deploy.
ASSUMPTIONS
- You have npm (and node) installed. Maybe use homebrew and
brew install node. Just a suggestion. - You have a Rails 6 app up and running. It can be fresh or not.
- You have a GitHub account.
- You have a Heroku account and have successfully deployed your Rails app to it at least once.
- Familiarity with git.
- You’ll replace every instance of
@usernamewith your GitHub username.
SET UP A GITHUB REPO
The first thing you’ll want to do is log into your GitHub account and create a new repository. I will be calling mine shared-theme. There’s nothing wrong with making your repo public, but in this tutorial I’m keeping it private. Keep the page open after you create the repository so we can reference the repo location in a second.
.THE NPM PACKAGE
If you’re new to these packages, don’t worry. All you need to understand about a package is that it’s a folder with a file in it called package.json. That json file serves as a manifest and describes what other files you’ve put into the folder.
Start by creating a new folder for your package. I like to put them here:
cd ~/Developer/packages
Add a new folder in there. In this tutorial I’ll call the folder shared-theme. We’ll go into that folder and use an npm command to step through a setup.
 cd ~/Developer/packages/shared-theme
 npm init
This setup will step you through some sensible defaults. You can mostly accept the defaults, but you’ll need to specify a few things yourself. When you are asked for the git repository copy and paste the location of the repo you just created in the last step. The end result is something like this:
    This utility will walk you through creating a package.json file.
    It only covers the most common items, and tries to guess sensible defaults.

    See `npm help json` for definitive documentation on these fields
    and exactly what they do.

    Use `npm install <pkg>` afterwards to install a package and
    save it as a dependency in the package.json file.

    Press ^C at any time to quit.
    package name: (shared-theme) @username/shared-theme
    version: (1.0.0)
    description: A shared theme for my Rails apps
    entry point: (index.js)
    test command:
    git repository: https://github.com/USERNAME/shared-theme.git
    keywords: rails
    author: Matt Haliski
    license: (ISC) MIT
    About to write to ~/Developer/packages/shared-theme/package.json:

    {
      "name": "@username/shared-theme",
      "version": "1.0.0",
      "description": "A shared theme for my Rails apps",
      "main": "index.js",
      "scripts": {
        "test": "echo \"Error: no test specified\" && exit 1"
      },
      "repository": {
        "type": "git",
        "url": "git+https://github.com/USERNAME/shared-theme.git"
      },
      "keywords": [
        "rails"
      ],
      "author": "Matt Haliski",
      "license": "MIT",
      "bugs": {
        "url": "https://github.com/USERNAME/shared-theme/issues"
      },
      "homepage": "https://github.com/USERNAME/shared-theme#readme"
    }
Awesome. Our package.json is all set up. Pay particular attention to the @username/shared-theme specified for the name. Swap that with your actual GitHub username. We want to ensure we’re publishing our package under our user account (or organization account) and not out to the broader GitHub Packages. You’d potentially hit a name conflict anyways.
Next, let’s create a stylesheets directory with a scss file in it to specify some variables in it. Your folder should look like:
.
├── package.json
└── stylesheets
    └── _variables.scss
I’ll just add a few color variables. If you use Bootstrap you might recognize these.
//stylesheets/_variables.scss
$primary:       #5bb3c0 !default;
$secondary:     #959CAD !default;
$success:       #4fc08d !default;
$info:          #6c77c3 !default;
$warning:       #c88261 !default;
$danger:        #be5045 !default;
$light:         #edf0f9 !default;
$dark:          #4a4b4e !default;
Again, the focus of the tutorial is not to create a beautiful and elaborate theme for our Rails app. It’s just the trivial example I’m using to demonstrate the usage of an npm package to share code.
Make sure to commit these changes in git and push them to the repository (shared-theme) we created earlier. Do that before moving on.
HOSTING THE NPM PACKAGE ON GITHUB
If you’ve used npm packages before, you’ve probably been used to the public packages. Do a simple yarn add whatever and you get it in your project. Well, there’s a bit more legwork if you want to use a private package. There’s even more legwork if you need a remote machine (that you have little control of) to deploy your project.
We aren’t going to host our package directly with npm. We’ll use GitHub Packages instead. This allows us to create a private repository and package without having to create an npm account.
First, log into GitHub and navigate to your personal settings. In the left column you should click on the link to Developer settings. Once you’re there click the link for Personal access tokens. Let’s go ahead and generate a new personal access token.
For the note I used the name “packages”. Tick the options for:
- write:packages
- read:packages
- delete:packages
Go ahead and generate the token and make sure to save it in a safe place. We’ll need it again momentarily.
Next, you need to open up either your .zshrc or .bash_profile to set an environment variable. I used PACKAGES_AUTH_TOKEN and it should look like this:
export PACKAGES_AUTH_TOKEN=GITHUB_PACKAGES_TOKEN
Replace GITHUB_PACKAGES_TOKEN with the token you just generated. Make sure to save the file you just updated and source .zshrc or source .bash_profile from the terminal.
Now, in your text editor, open up package.json from within your package. We need to add a name/value pair to instruct npm/yarn where to publish and retrieve our package from. So add the following: json "publishConfig": { "registry": "https://npm.pkg.github.com/" }
Now any commands we issue to this package will know not to just assume we’re talking about npm hosted packages, but look to GitHub instead. Make sure the file is saved. You’re now ready to publish the package. If everything is in order, you’ll want to run
npm publish
You’ll see a + @username/[email protected] if everything went as planned. Congrats you published your package!
LOCATING YOUR GITHUB PACKAGES
If you want to find your package on GitHub you need to select Your profile from the dropdown menu in the top nav. There you’ll see a packages tab. Click on it to view the package you just published.
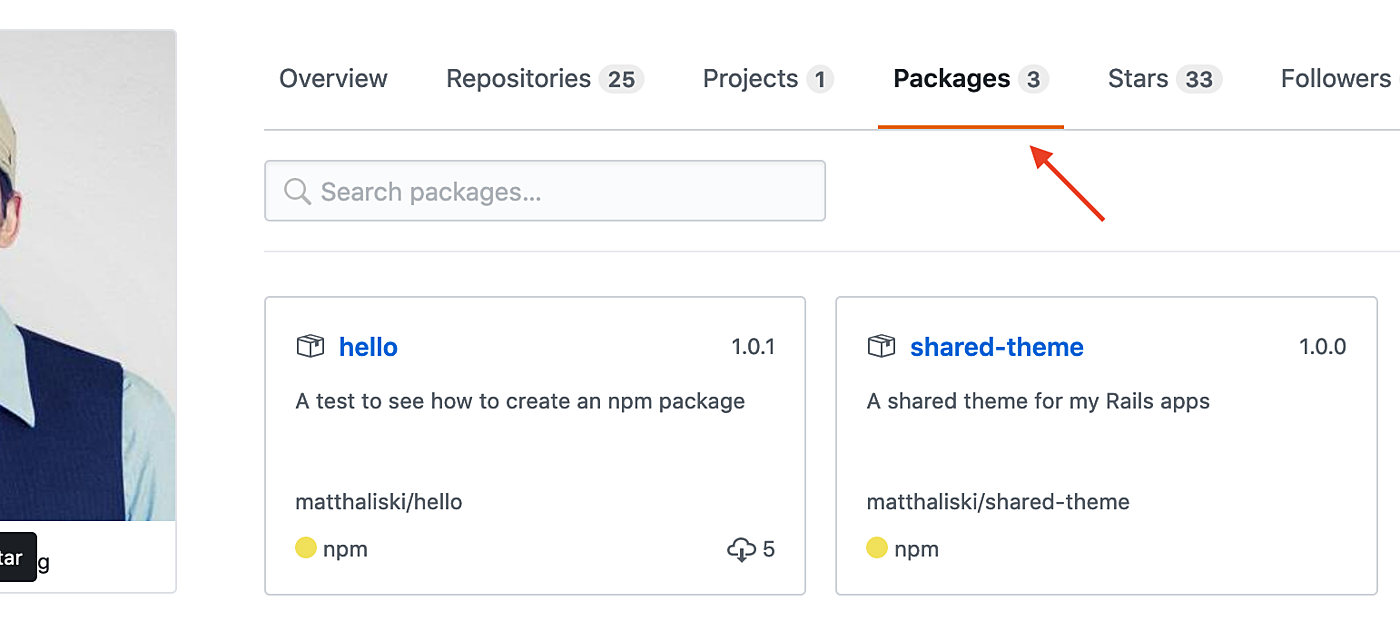
Note: GitHub made this package private because my repository was private. I’m not sure if there’s a way to publish a public package from a private repository, or if that even makes sense. Bottom line: I don’t think there’s a command to define it’s access. It’s just based off your repository status.
ADDING THE PACKAGE TO RAILS
The majority of the legwork is out of the way. We’re simply going to add this package to a Rails app of our choosing. The following instructions assume you are using Webpacker in your project to package and serve your assets. Setting up Webpacker is a whole topic unto itself and won’t be covered here.
First, create or open an .npmrc file in the root of your Rails app. We’ll add the following to tell Yarn to look at GitHub for packages as well.
@username:registry=https://npm.pkg.github.com/
//npm.pkg.github.com/:_authToken=${PACKAGES_AUTH_TOKEN}
We previous setup the PACKAGES_AUTH_TOKEN so it’s going to get read in here as an environment variable when the file is processed. Additionally, replace @username with your GitHub username. These directives are now giving our Rails app an addition location to search for npm packages. In this case, access is granted to our private package through auth token we generated.
If you’d like to skip this step in the future you can add the same thing to your global ~/.npmrc file. Then future projects have the ability to search GitHub for packages. That being said, you wouldn’t be including this information with your Rails app and would have to do some extra explaining to developers setting up the project in the future.
Next, we’ll simply use Yarn to add the package we created.
yarn add @username/shared-theme
This adds our private package and updates the package.json file in the root of our Rails project. If you’re wondering where it installs it’s in the node_modules directory (which is ignored by Git). I suppose the the last thing to do is to @import the _variables.scss file we created inside our npm package.
Find the manifest file for all your styles. Again, there are lots of ways people setup Rails+Webpacker so it’s hard for me to determine what you’ll be using. Prior to the introduction of Webpacker you’d be looking for app/assets/stylesheets/application.scss or something like that. You want the manifest file that is including all the other Sass files you have. In that file you’ll reference the styles in your package like this:
// Make sure you lead with the ~
@import '~@username/shared-theme/stylesheets/_variables';
Yay! You should now be able to references the Sass variables like $primary and $secondary in your Rails app. This wraps up everything on the development side of things. Time to get it deployed.
DEPLOYING TO HEROKU
Nearly done folks. If we did a git push heroku master right now to deploy our application it would blow up. Can you guess why? Well, it’s currently trying to check out our private package from GitHub, but it doesn’t have the auth token. We added that token to our local machine earlier, but Heroku needs it too. So, open a terminal and cd into your Rails app directory. Then set the PACKAGES_AUTH_TOKEN on Heroku like this:
heroku config:set PACKAGES_AUTH_TOKEN=GITHUB_PACKAGES_TOKEN
If you don’t remember what the token value is, remember you added it to your .zshrc or .bash_profile and can look it up there. Heroku now has the access needed to download your private package. Try deploying your site now. With any luck, everything will build nicely and you’ll be up and running.
CONCLUSION
That was kind of a gnarly tutorial, but hopefully you see its utility. You can now create all kinds of little packages and incorporate them into projects with similar needs. Now, why the hell didn’t I put this all in a Ruby gem like a normal person? That’s a question I can only partly answer.
It would seem that Rails is becoming much more open to the idea of Webpacker doing some heavy asset lifting. Particularly with JavaScript. I can see a world in which Rails slowly deprecates the Asset Pipeline and just lets everything get handled by Webpacker. I’m a nobody and have no knowledge of whether this will happen, but I could understand it if it did.
Therefore, sharing frontend assets like Sass and JavaScript through npm packages becomes a pretty neat little trick. We’d let the frontend stuff get handled by Webpacker and we’d leave Ruby code to our gems.
Long story short, doing it this way is perfectly acceptable now and maybe even future-proofs you for later.
LAST LITTLE THING
If you’re going to be working locally on a Rails app with npm packages that are also in development, you’ll want to check out yarn link. It will set up symlinks to your working directories and let you reference those rather than having to publish packages and update them all the time.