Quarantine shed project
Being stuck in our homes has resulted in less time in front of the computer and more time tinkering around the house. I can’t say I saw a global pandemic coming, but a year ago I started rebuilding a section of our yard in preparation for a shed. I guess now is as good a time as any to finish out the project.
STARTING POINT (PRE-CORONAVIRUS)
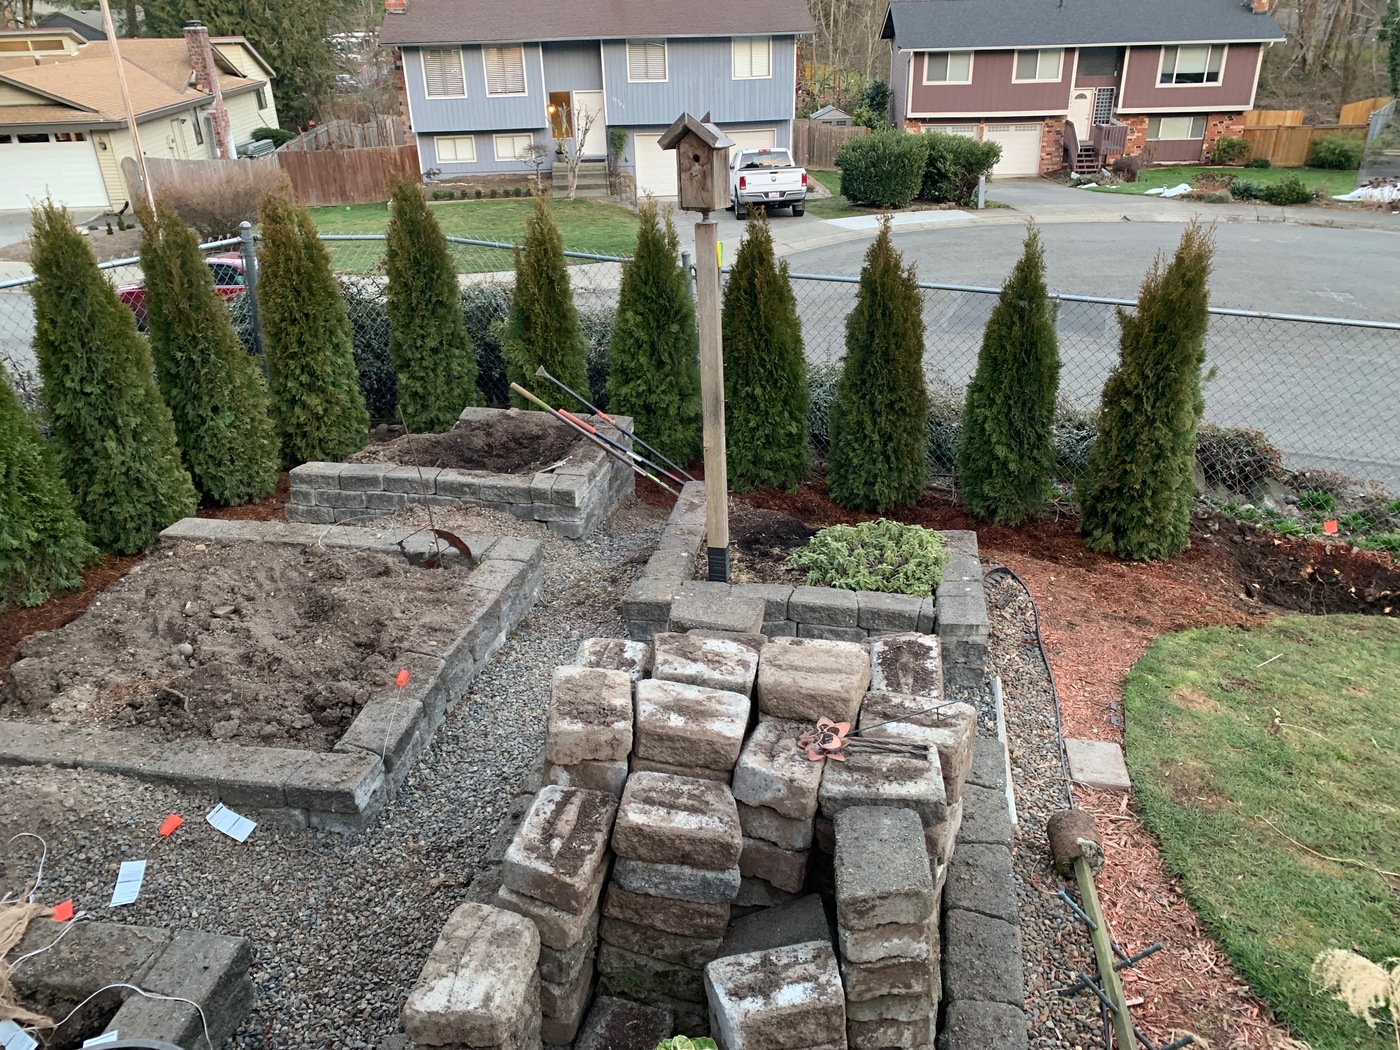
The previous owners had built 5 raised beds out of concrete blocks. They must have ordered a thousand of these blocks because they’re all over the property. Literally everywhere.
Anyways, this was the earliest picture I could find. The beds were sagging and separating in spots. I’m not sure how many years they would have been good for. There was no better location on the property to construct a shed, so we decided to reuse these blocks and make a pad for a shed.
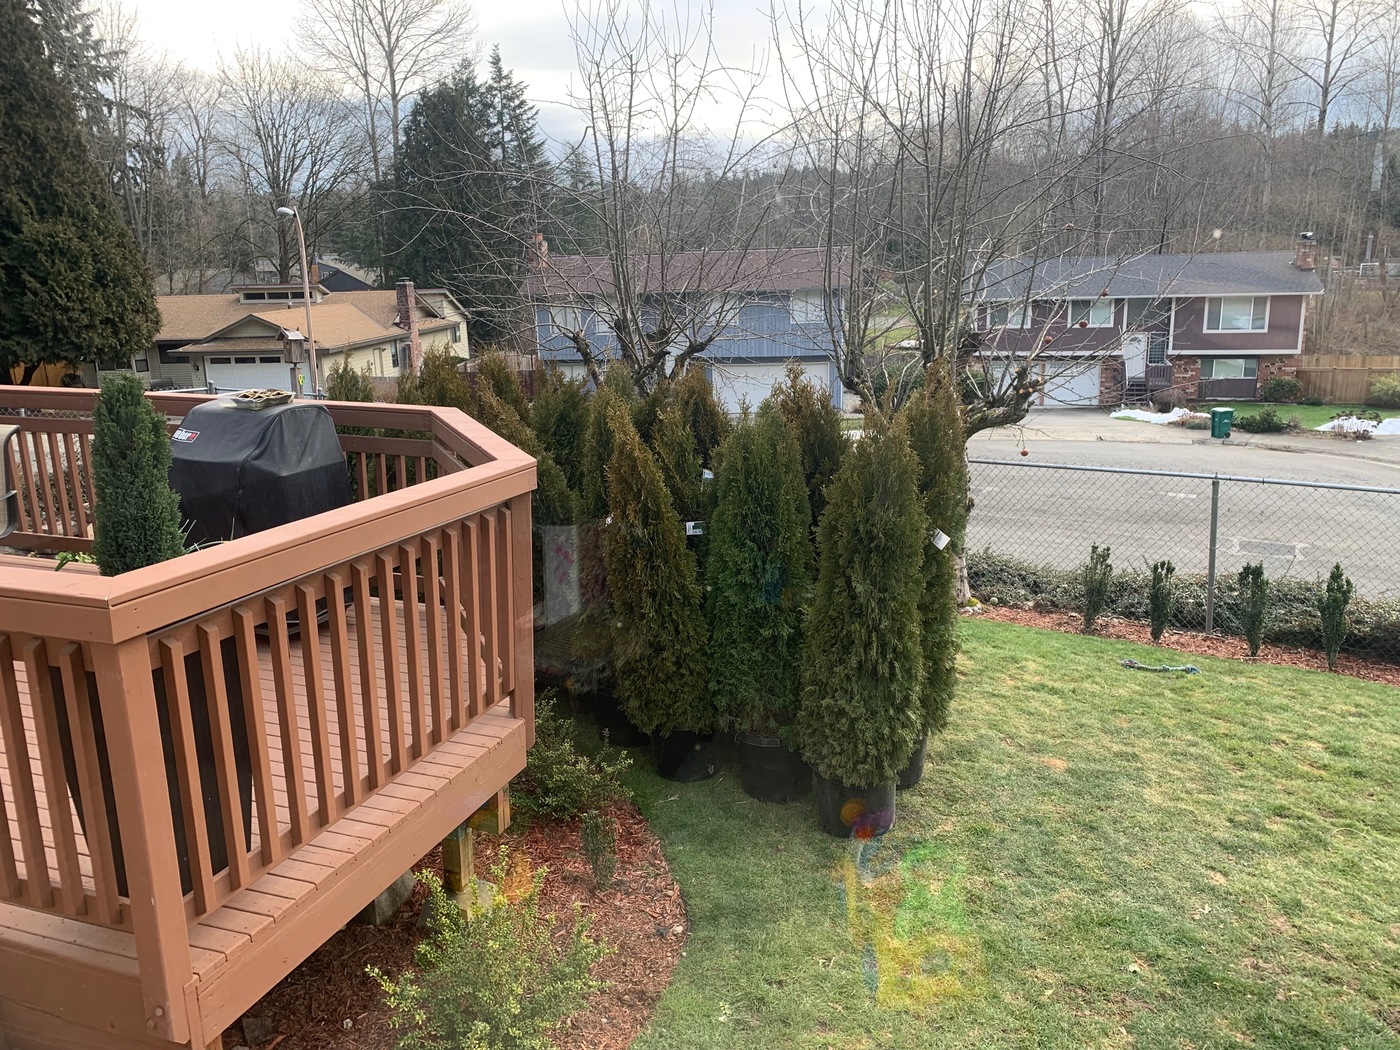
I didn’t want the neighbors to have to stare out their front windows at the side of a shed (I’m not a monster) so the first step was to install a wall of arborvitae. I ended up loading up 27 of these by myself into a rental truck. Local nurseries wanted double what I paid for these because they wanted to haul and plant them themselves.

The first row in.
Almost all of them are in at this point. I was approaching a couple of apple trees that needed dealing with. The two apple trees were let to grow much too large and produced a bazillion apples. We’d spend entire summers picking fallen apples out of the yard (and the sidewalk below). Most were inedible due to worms and whatnot.

I think this was all of them. That’s a lot of hole digging!
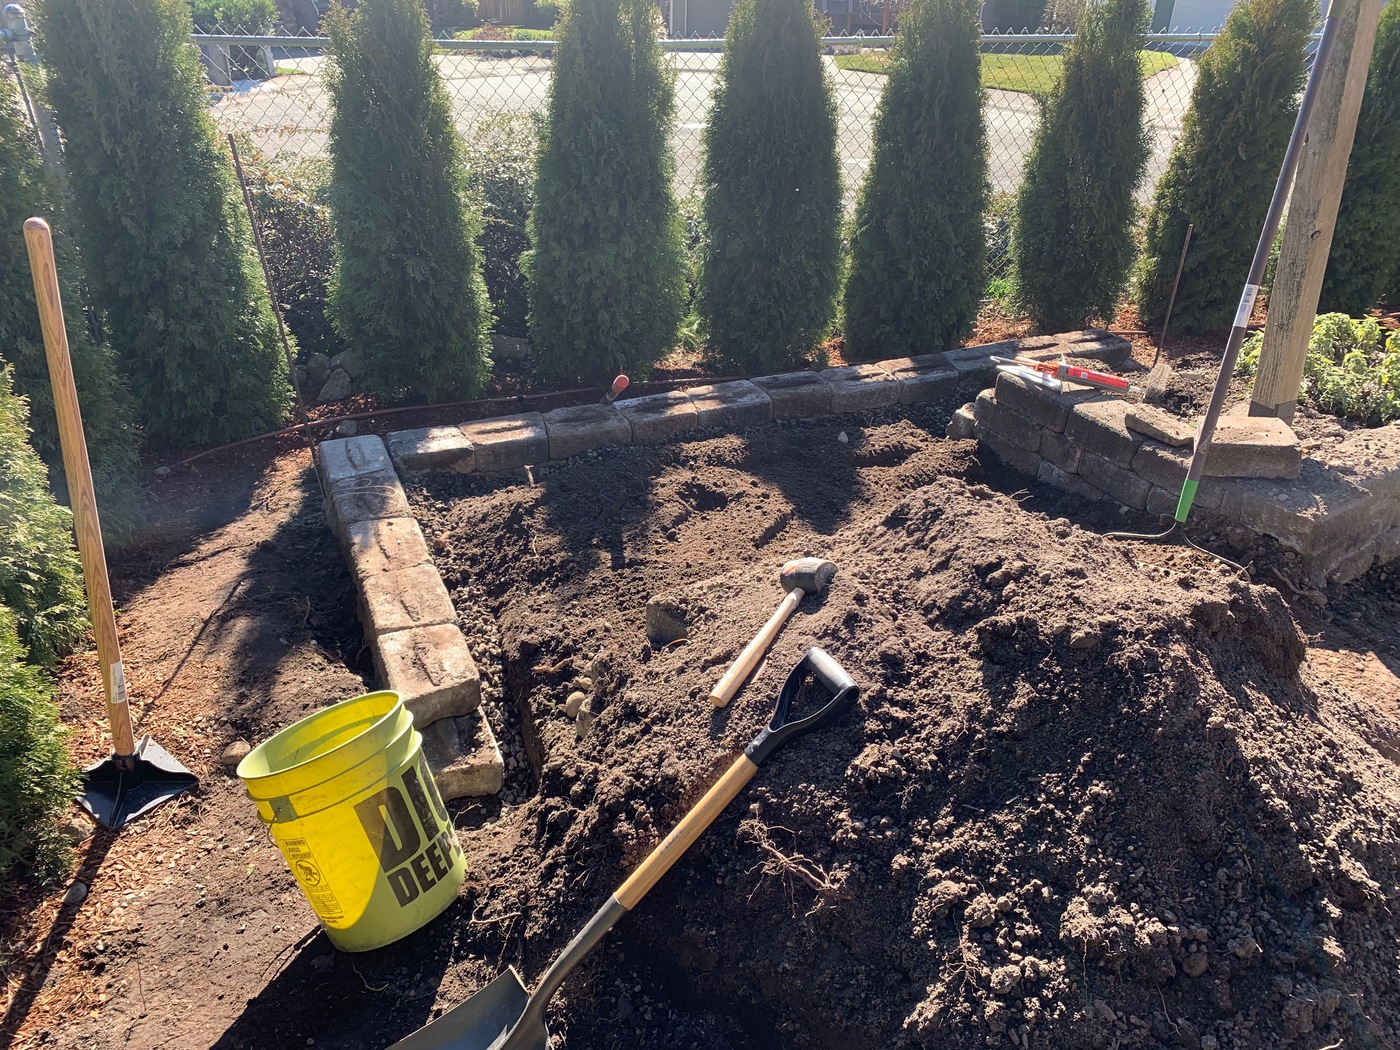
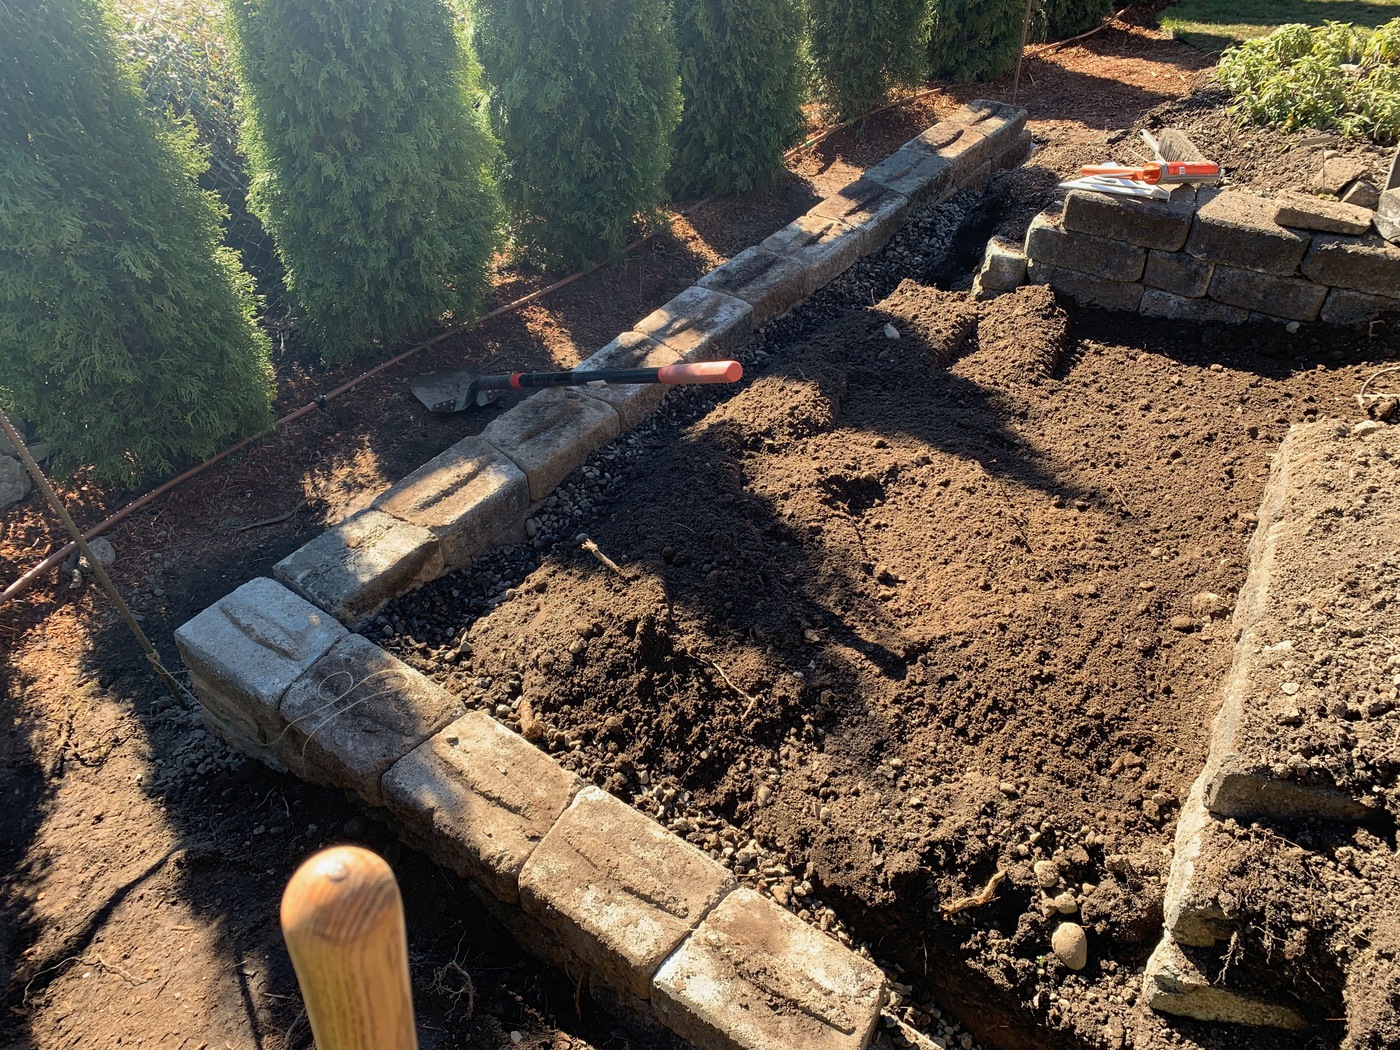
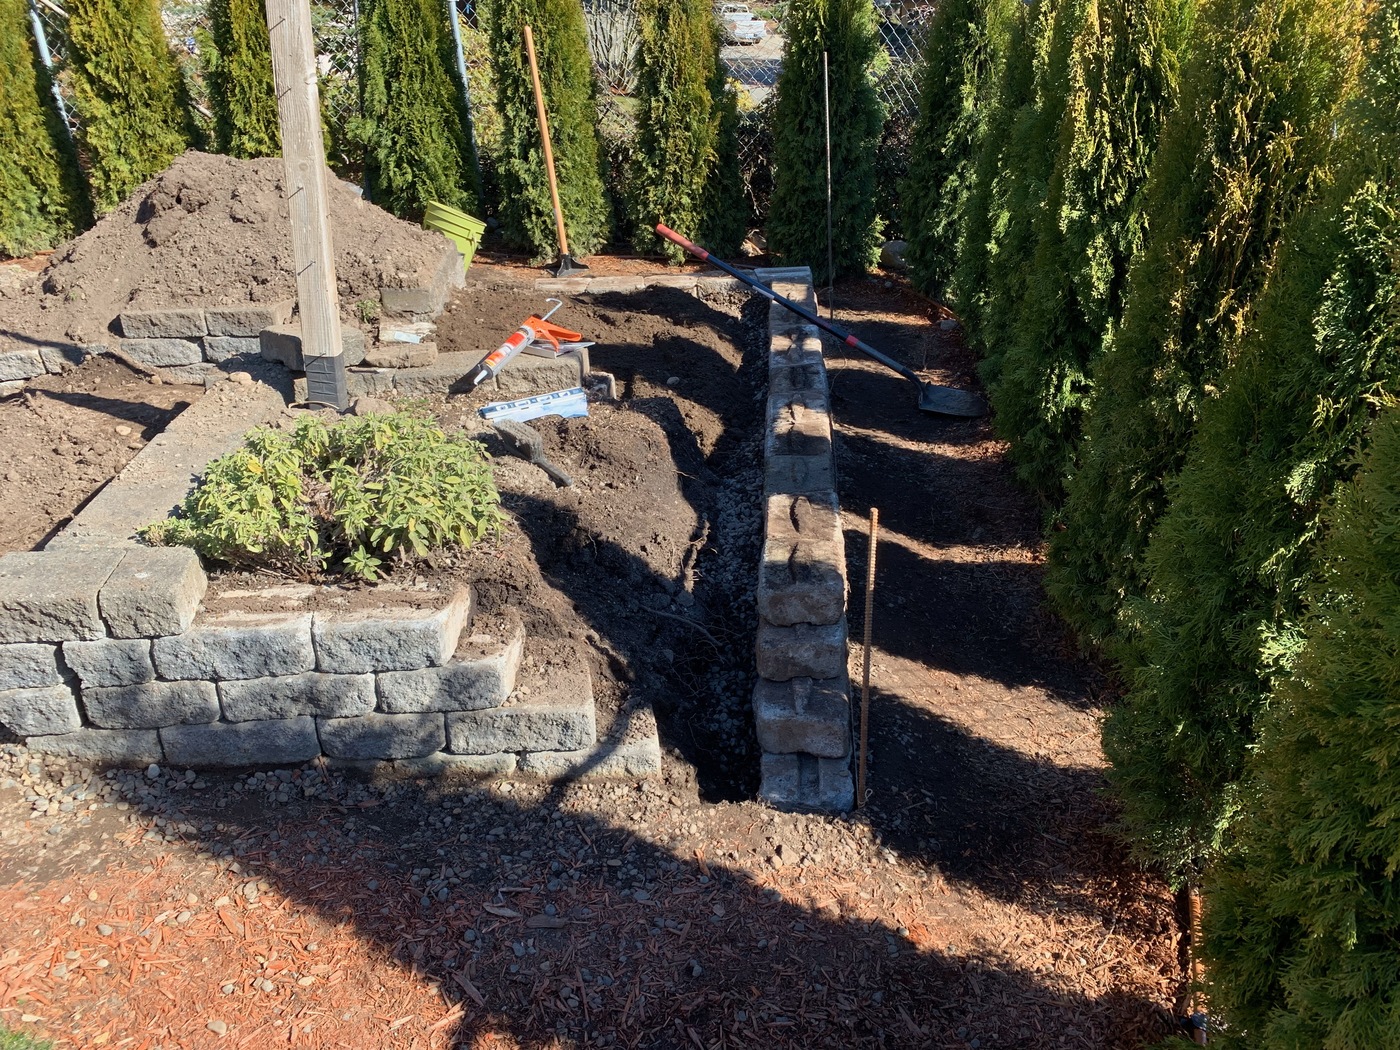
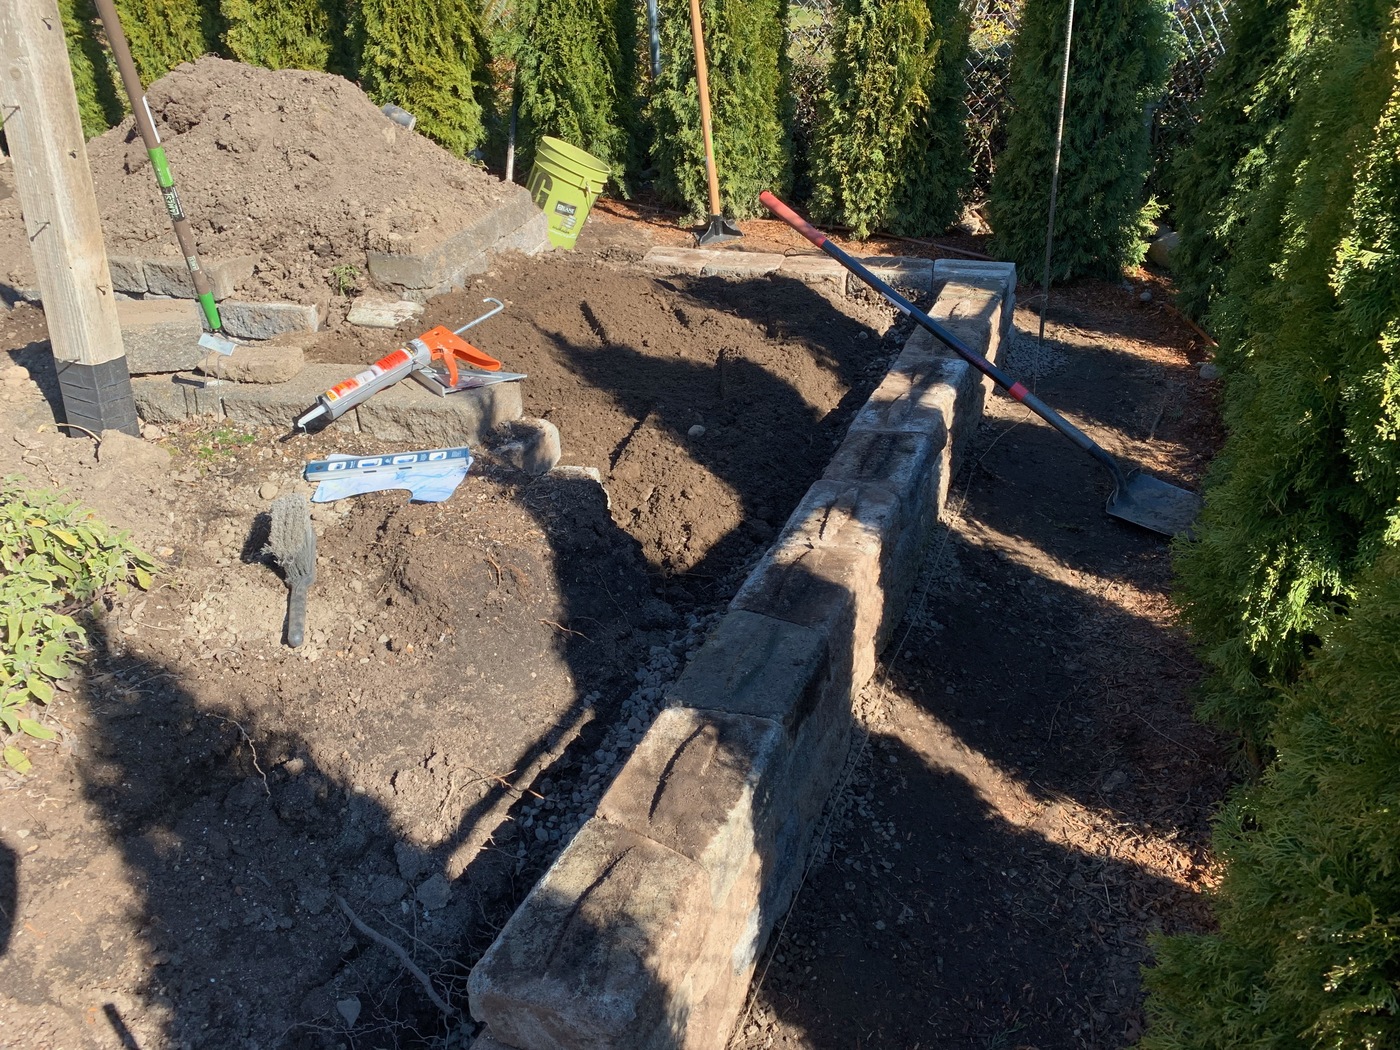
Next up was constructing the retaining wall for the pad and I had more than enough blocks to work with. It is not fun work. My hands, back, and knees all hurt for days. Everything has to be level and able to drain. Respect to the people who do this for a living. I’ll be sticking to the computer.
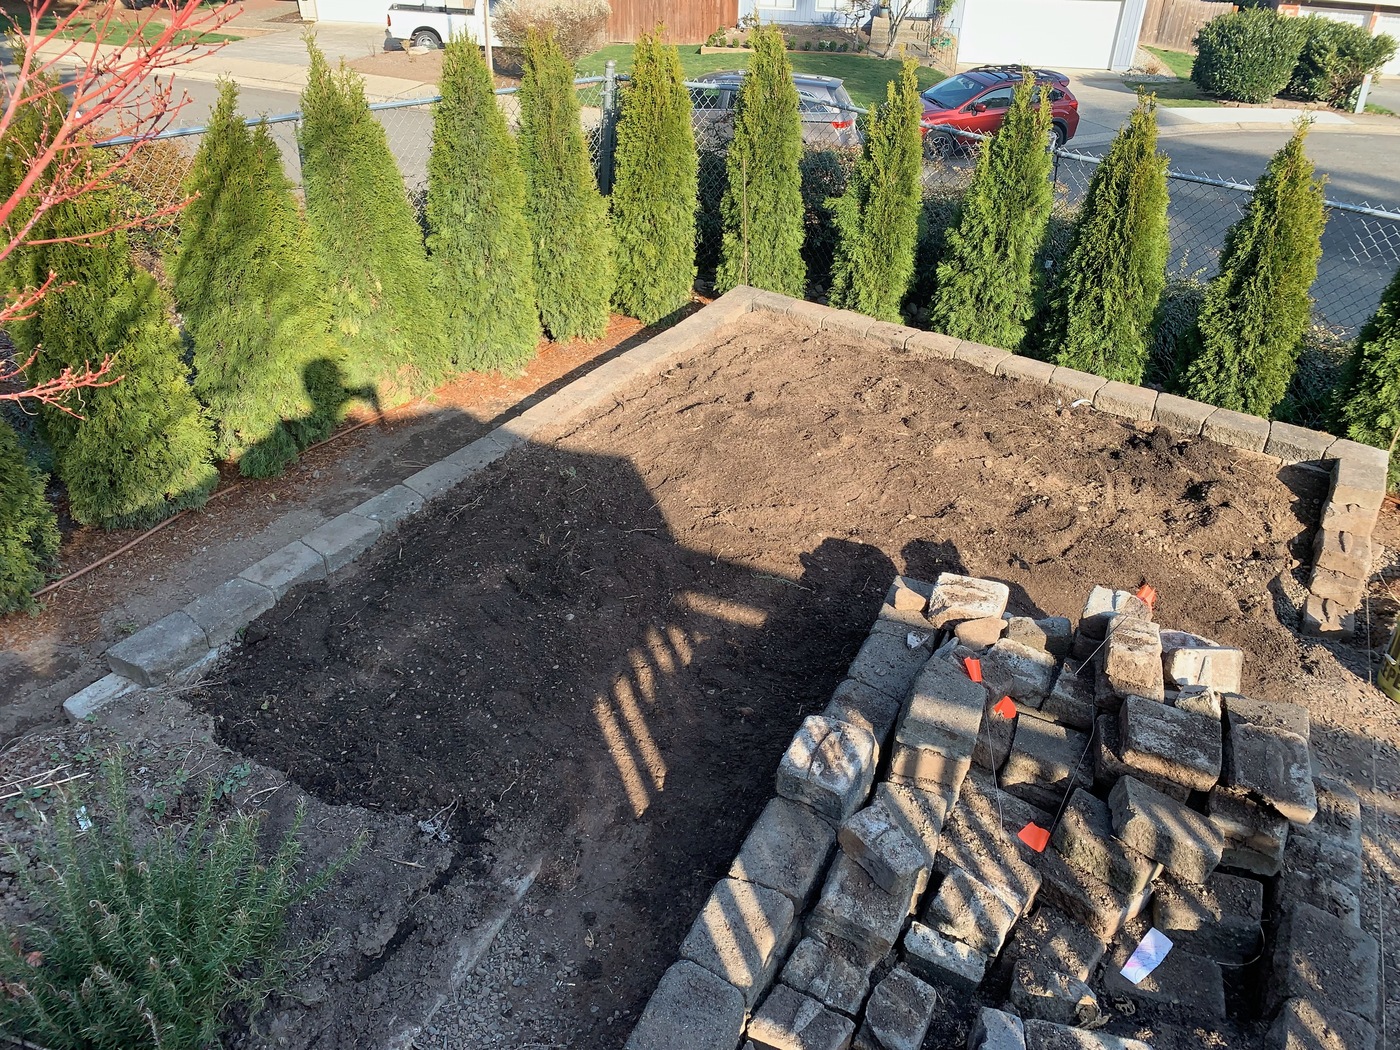
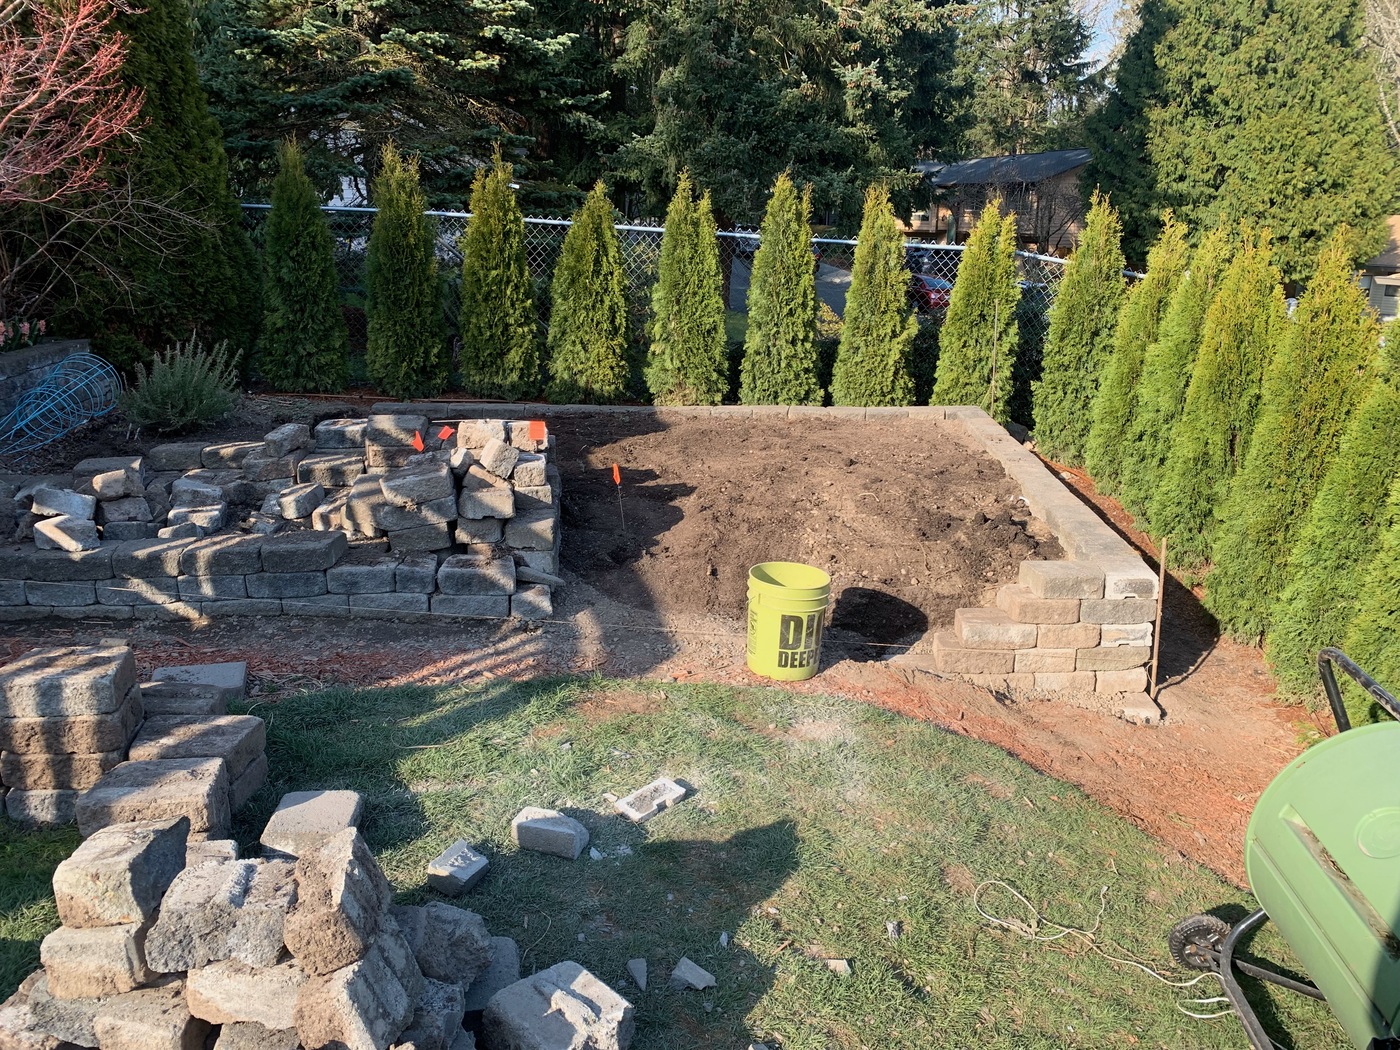
The shape is more or less complete at this point. I had a ton of materials left over so….
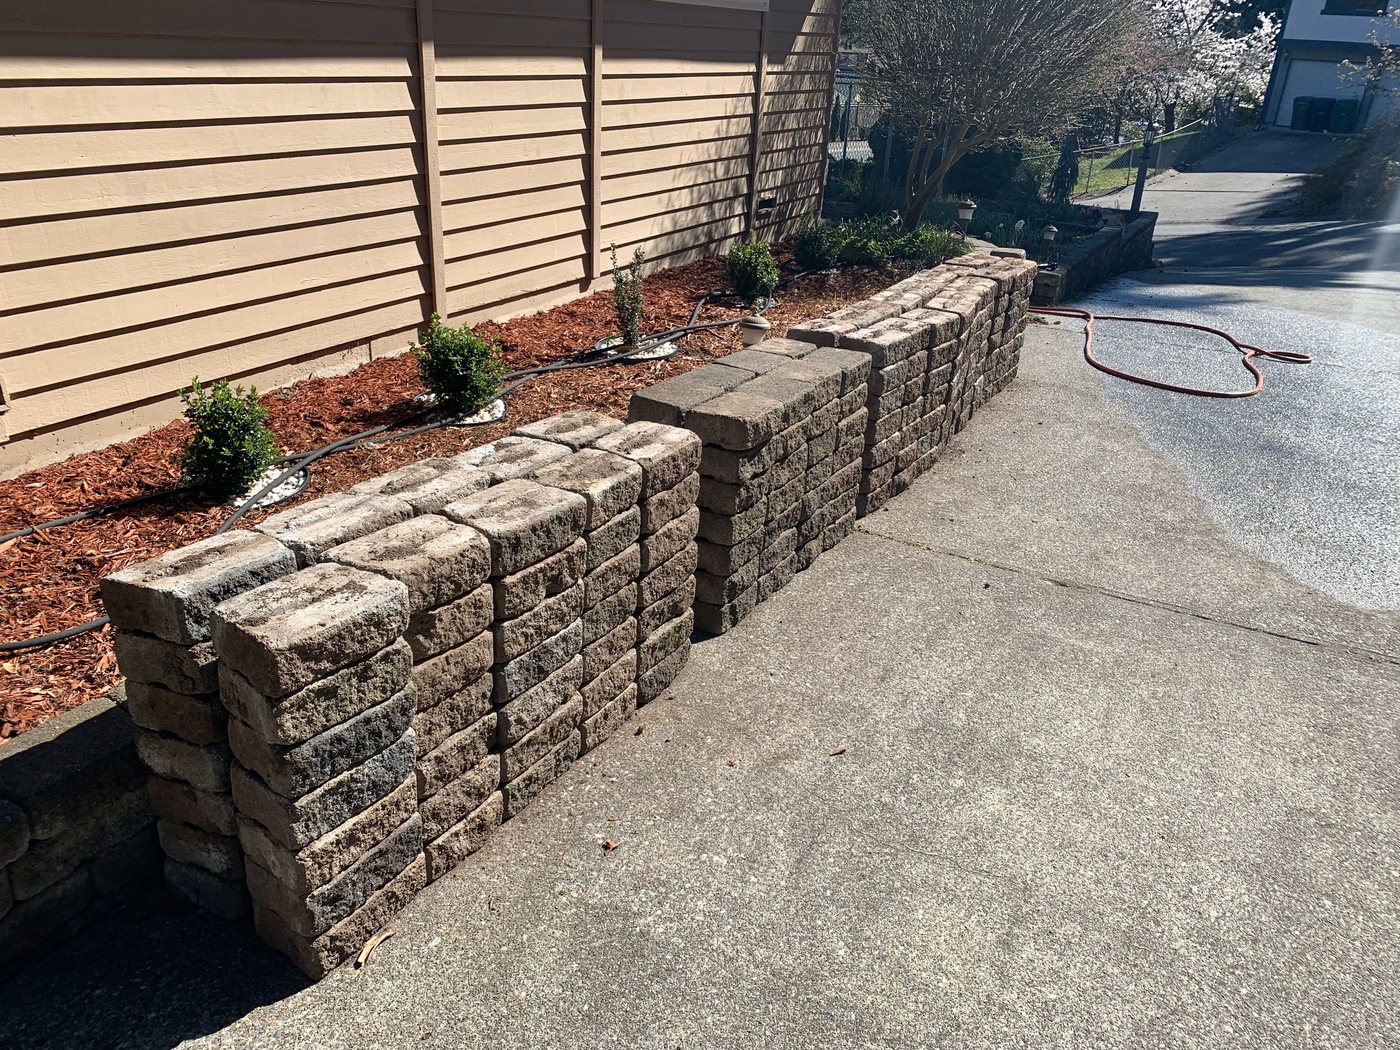
Habitat for Humanity got some concrete garden blocks! Hopefully, they’re doing some good wherever they ended up.
SHED FOUNDATION
Now, I’m not a structural engineer, but I knew I didn’t want to lay down some runners directly onto the pad. First, our property is naturally sloped. The concrete blocks are more “garden blocks” as opposed to big honking retaining wall blocks. Lastly, the soil consists mostly of fluffy garden bed dirt which isn’t heavily compacted.
I was worried about the soil compressing against the weight of the shed and possibly blowing out the retaining wall during heavy rain. Pretty sure there’s no coming back from that. So my thought was to get the runners on some concrete piers to ensure that the weight of the shed was distributed below the retaining wall. We don’t have to worry too much about the ground freezing in the Seattle area, but I’ll be covered in this scenario.
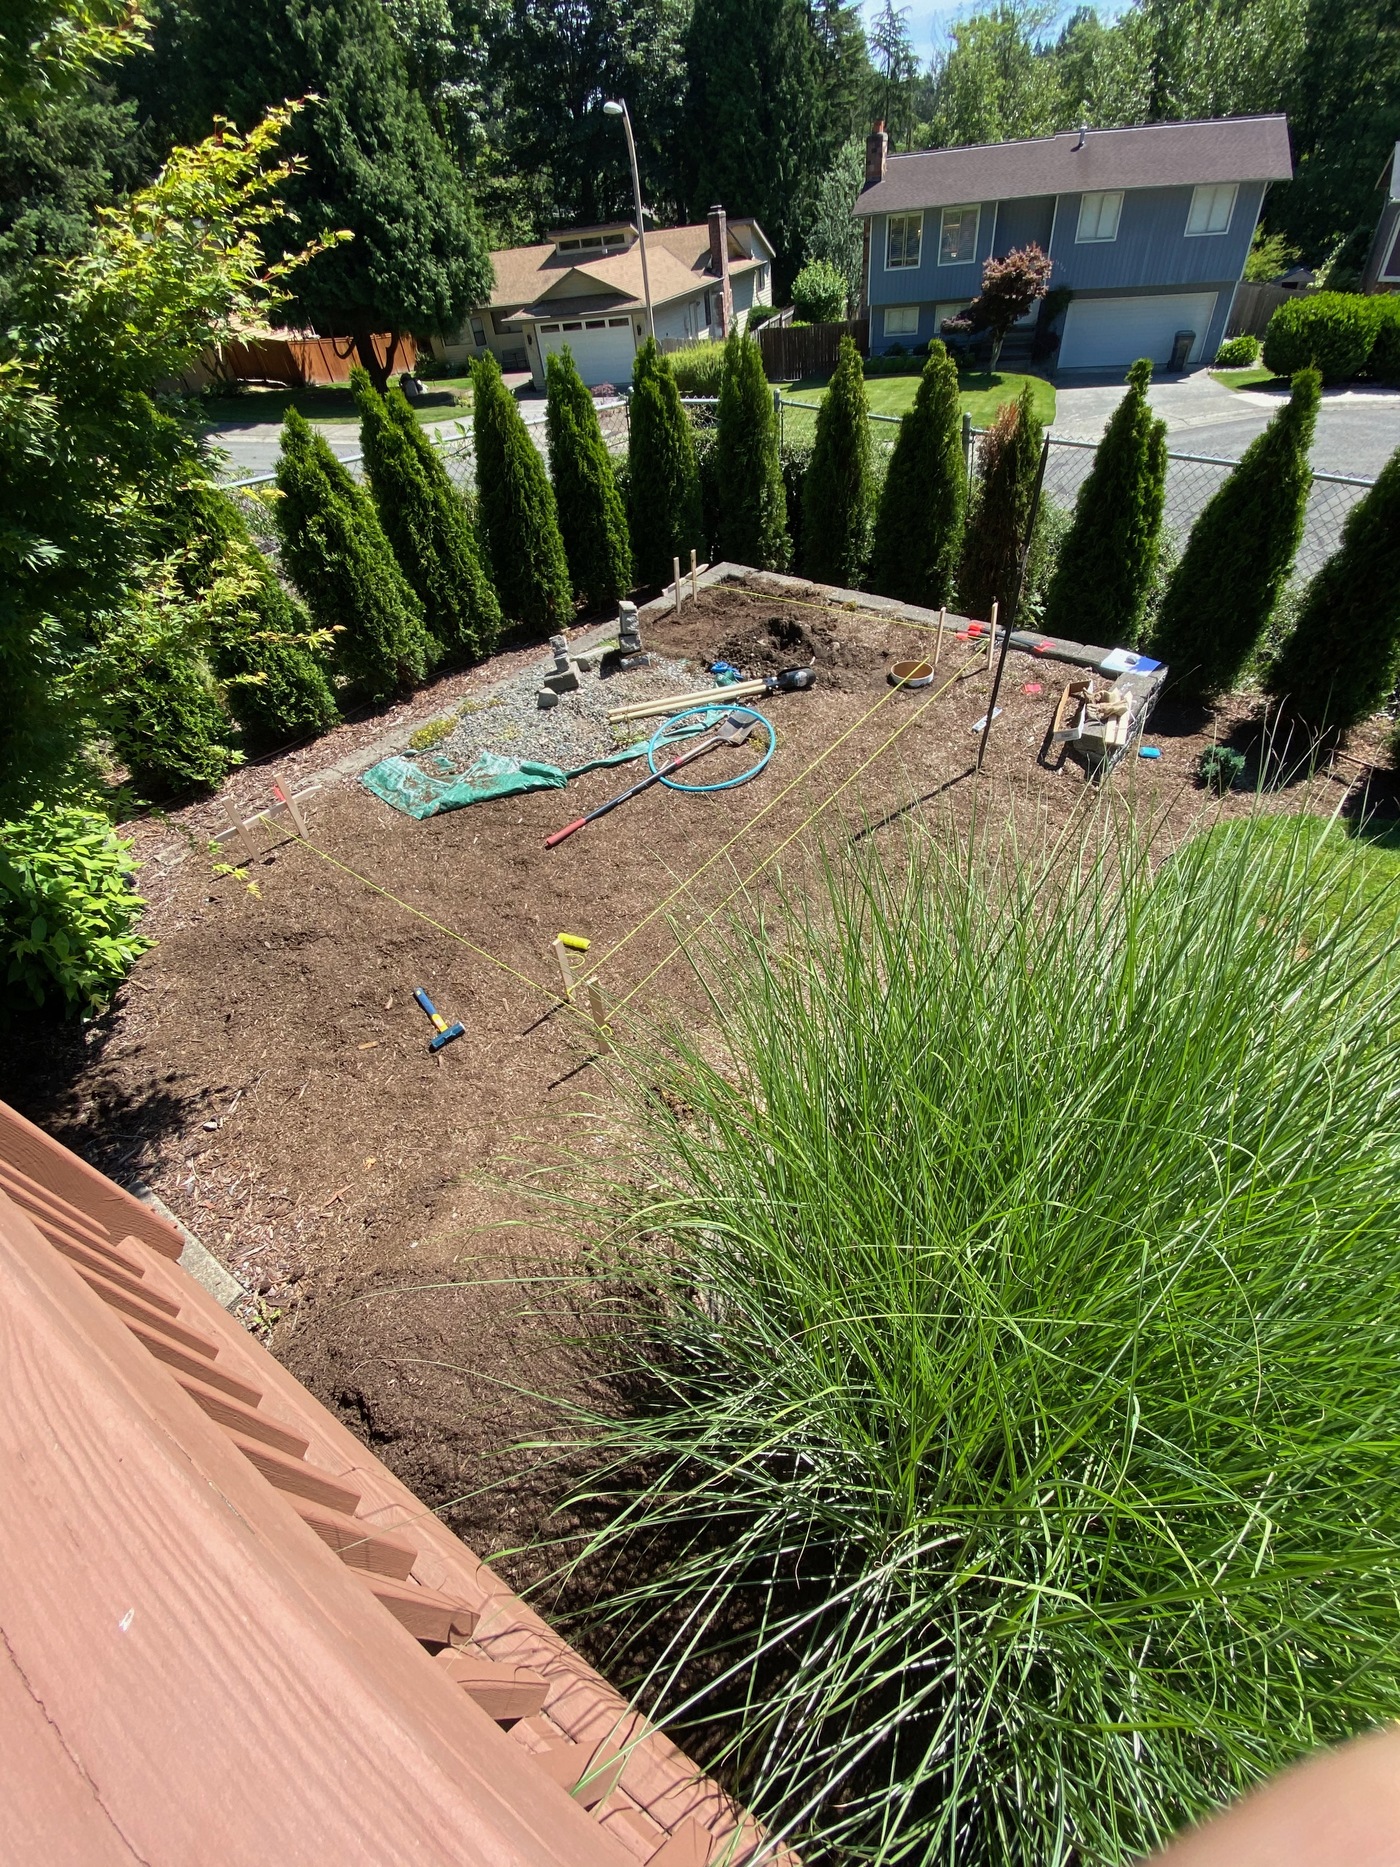
I started with a single pier so that I could use it as a pivot point for the 12′ 4×4 after it cured.
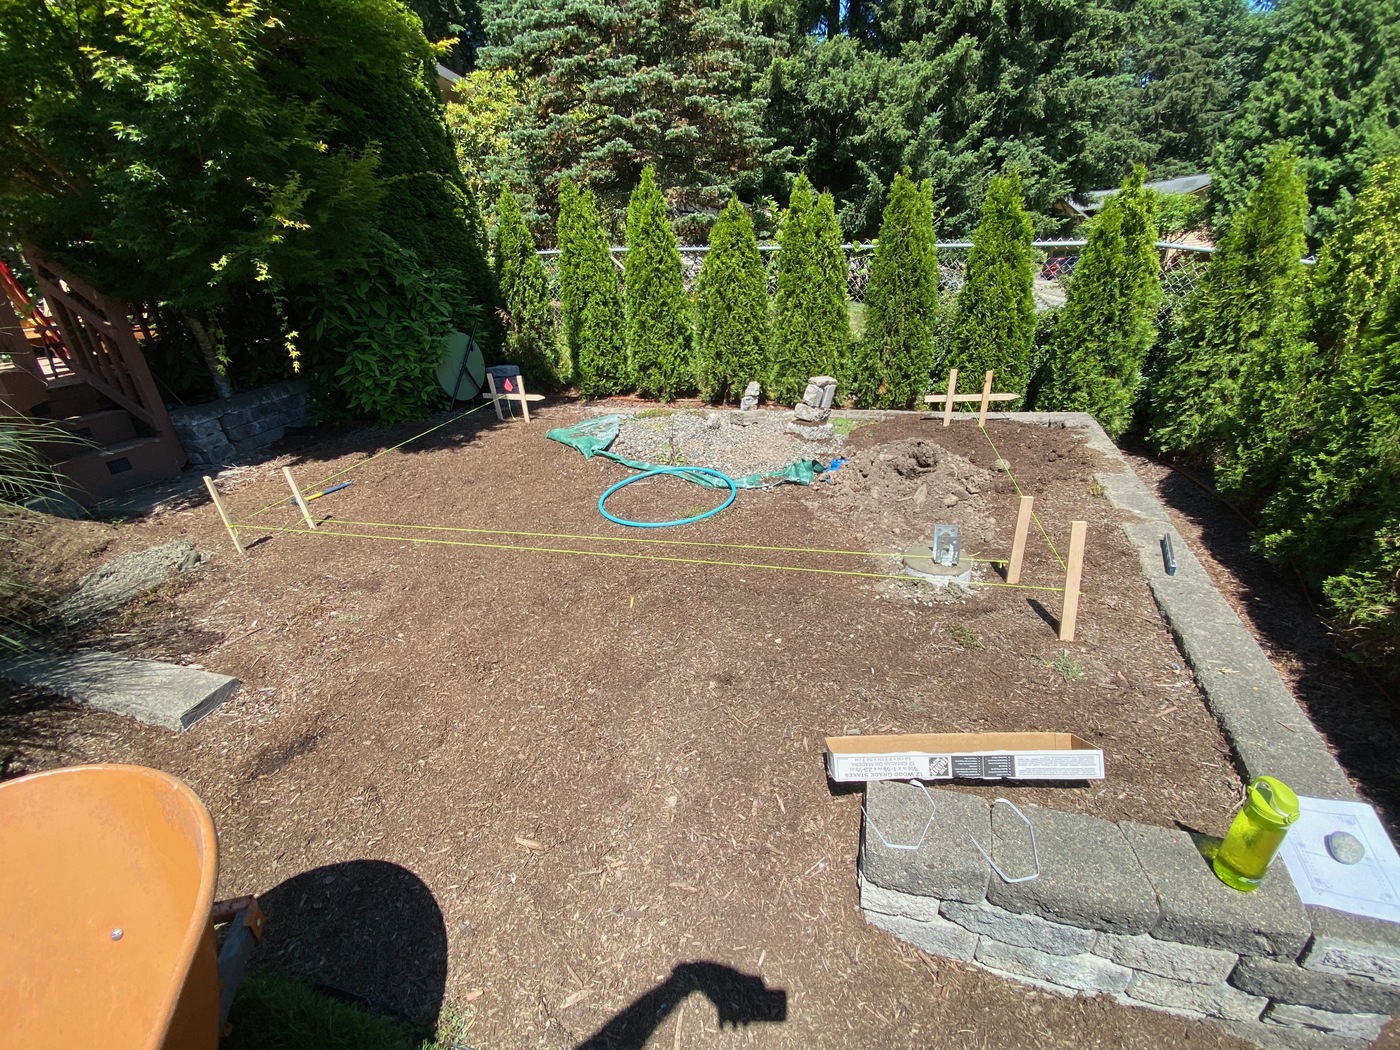
First runner is good and level.
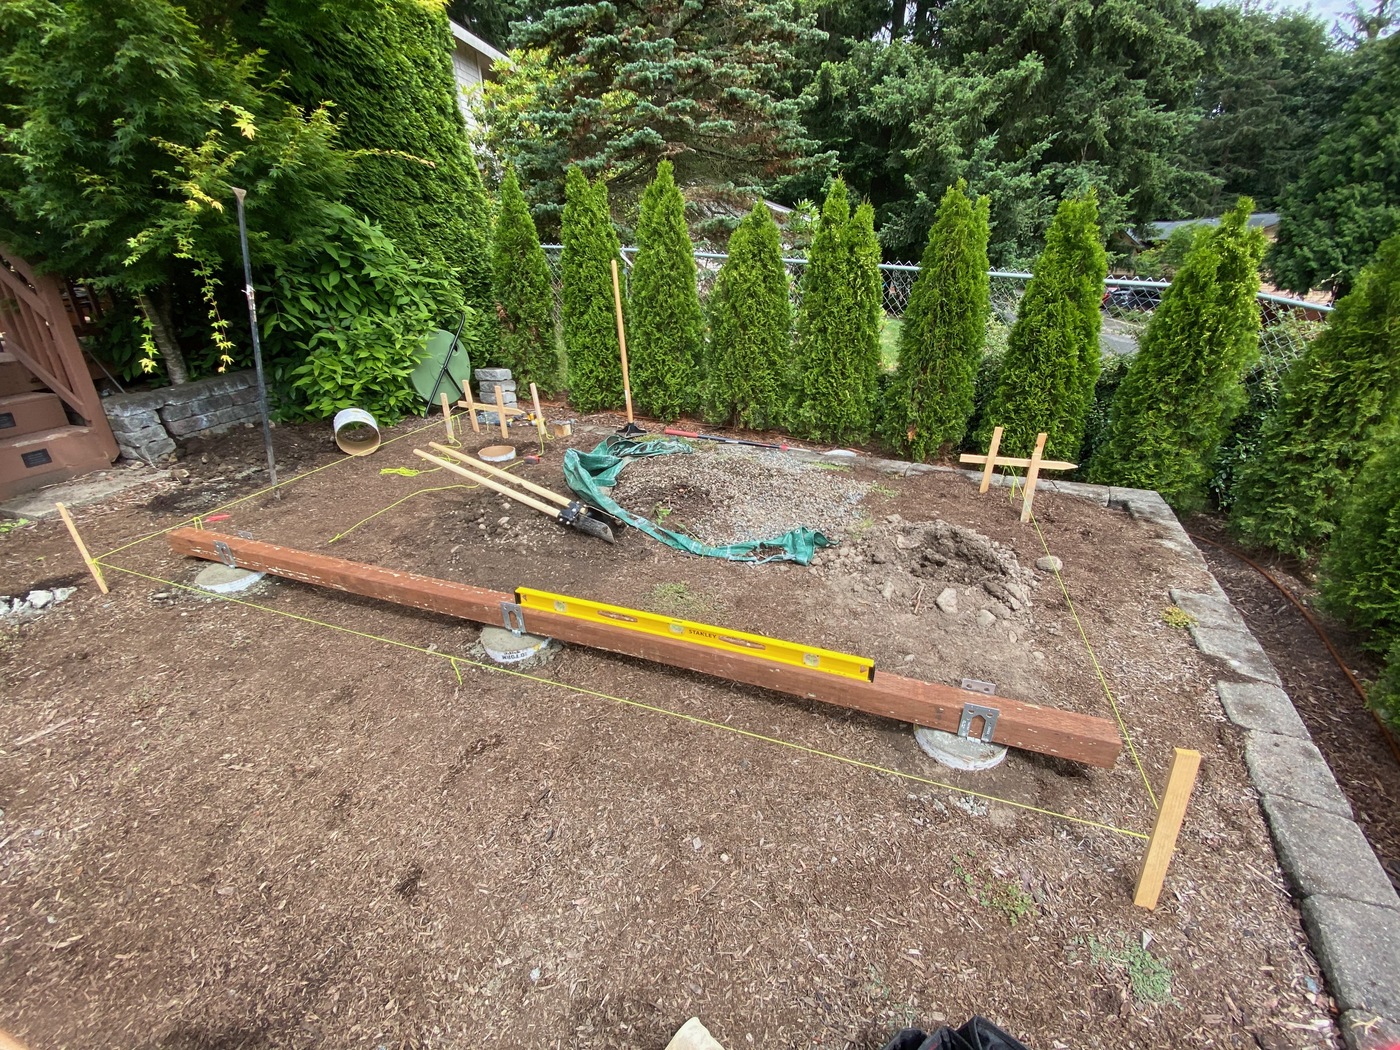
I repeated the process of pouring a single pier in the back making sure it was level with the front runner.
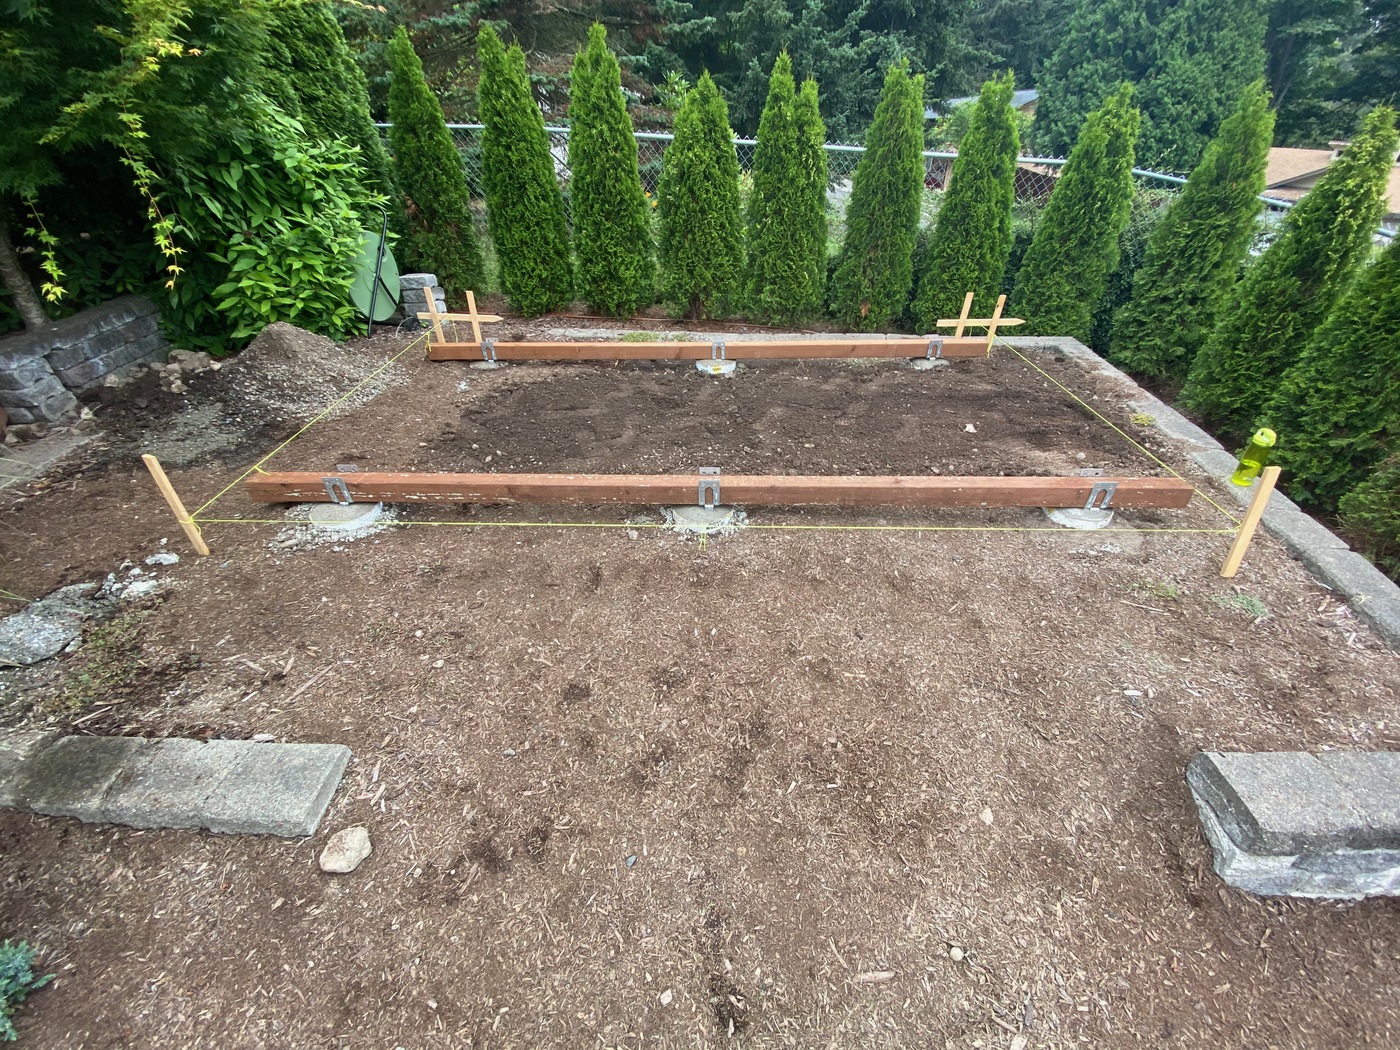
Runners are done. I need to screw them into the standoffs and probably have to cut off the excess metal before the floor goes on.
Now I’m just waiting for the shed to arrive. The factory is in Michigan and everything is delayed because of COVID-19. Wear your masks and save some lives. We all want to get back to normal.
IT’S SHED TIME!
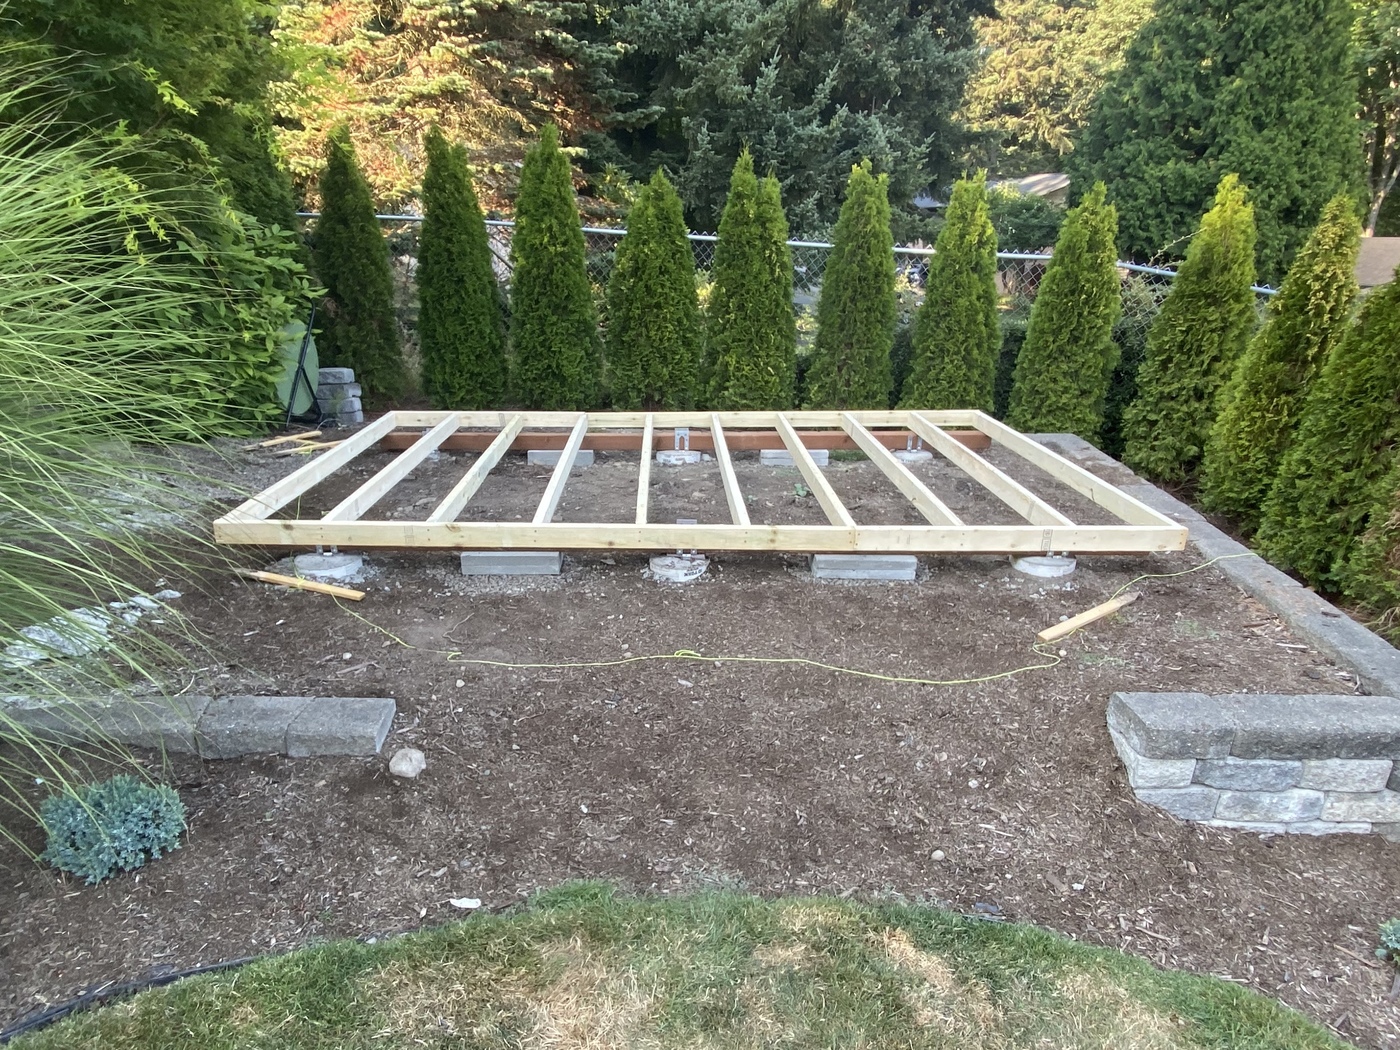
The first thing is the floor frame. 16″ centers. Runners were nice and level so nothing needed to be shimmed.
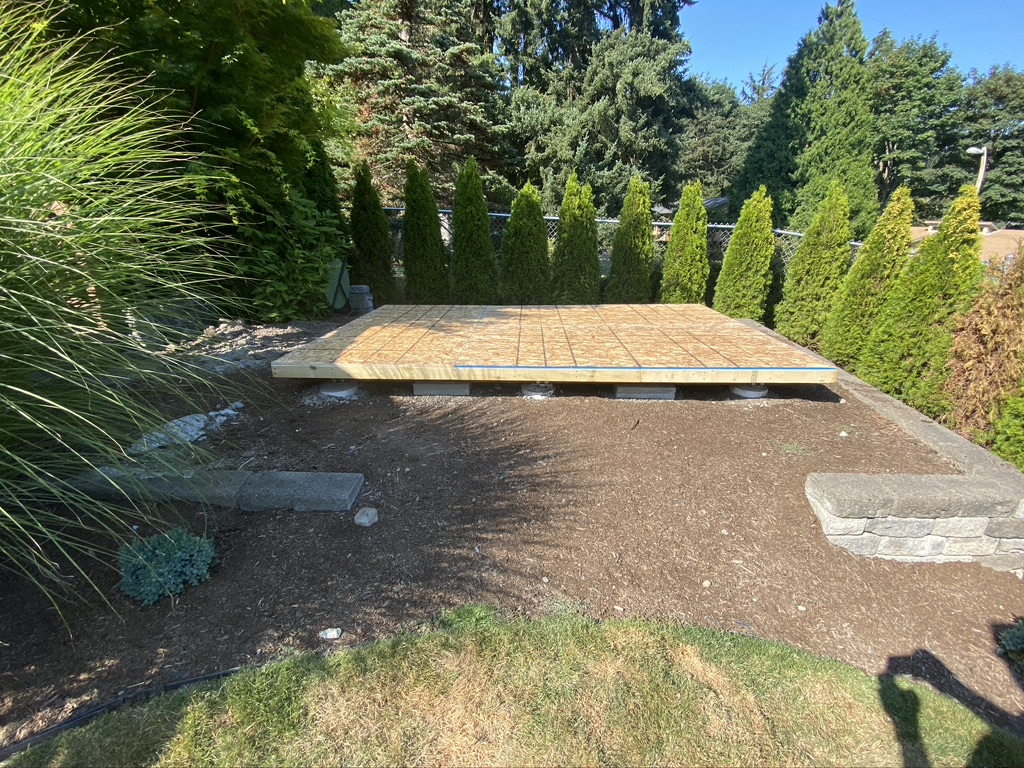
Next came the plywood floor itself. Again, things stayed level.
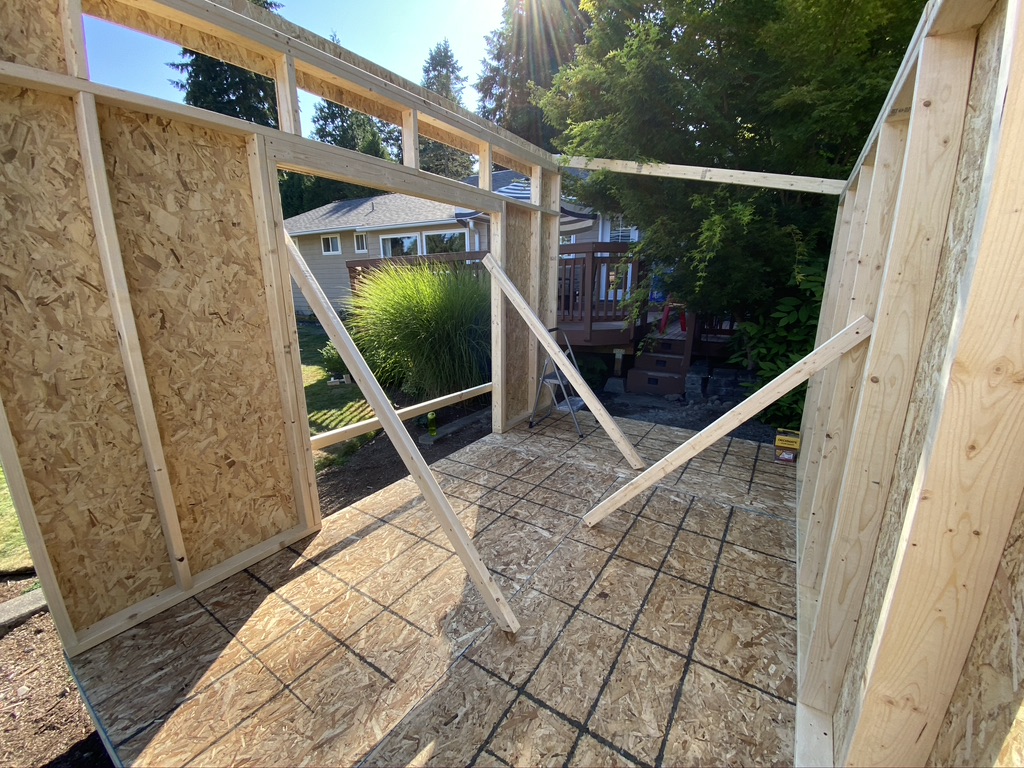
You end up using the floor as your platform as you build the rest. The front and back walls are assembled on the platform and then tilted up and temporarily supported.
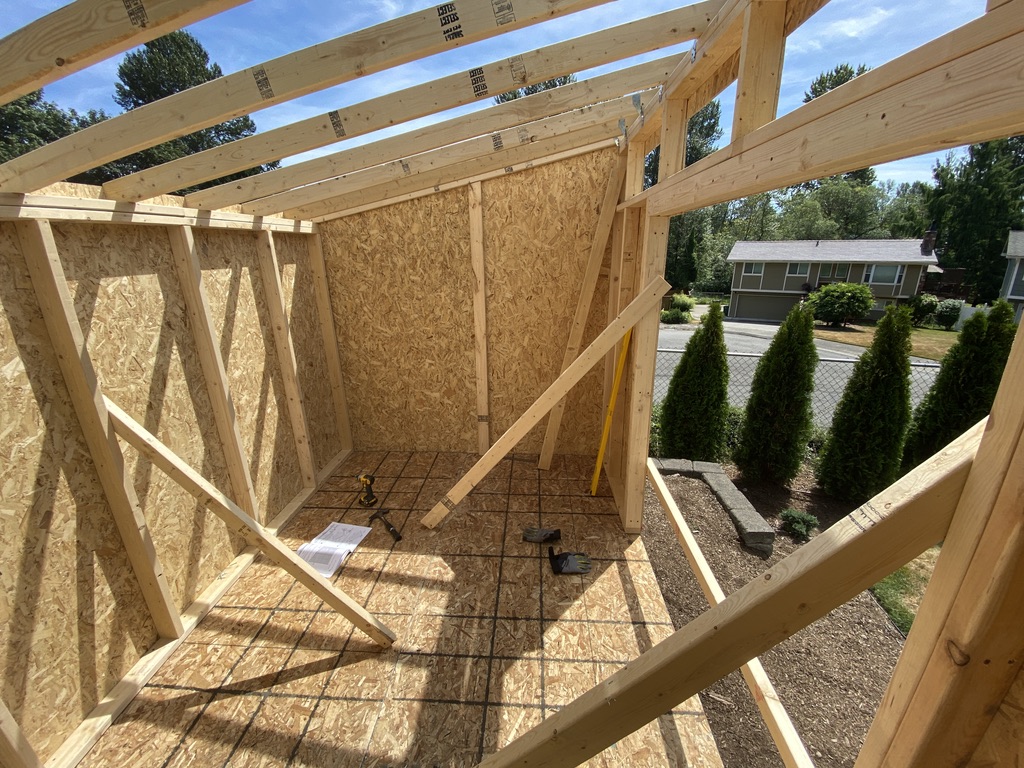
The rafters, siding, and roof sheathing came next. You get a pretty good idea of what it’s going to look like at this point. Plus you have a covered place to work that’s out of the sun.
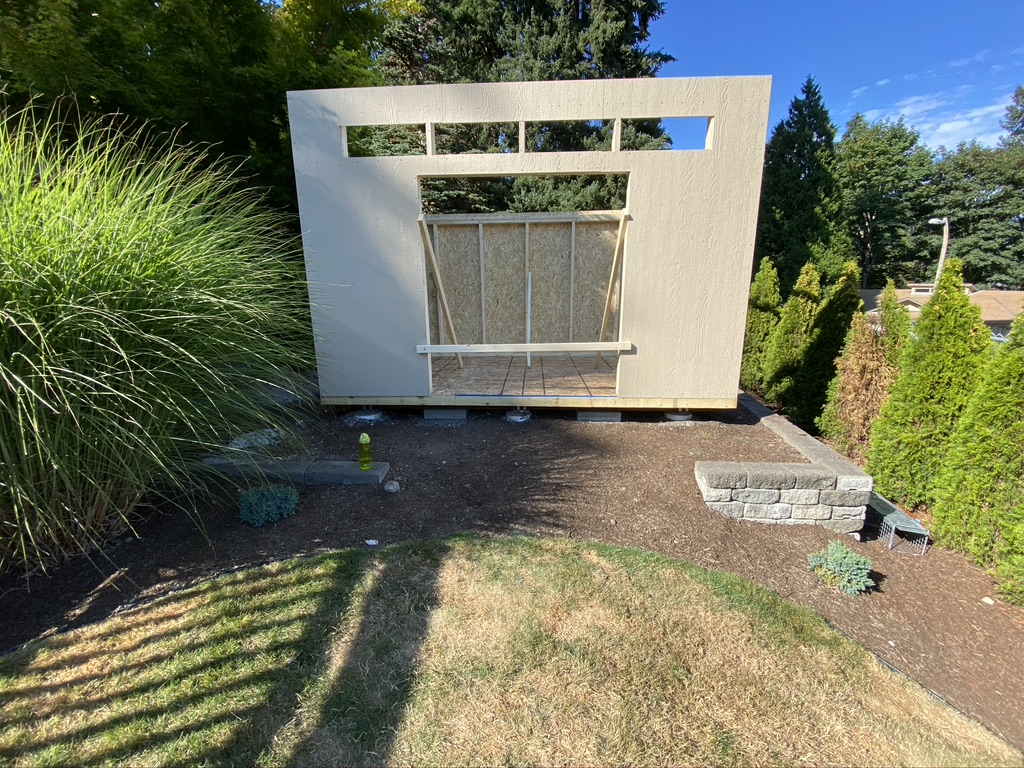
Next were the soffit around the roof, windows, and some trim. The precut holes for the windows were slightly off, but I knew the trim would both be white and disguise the misalignment.
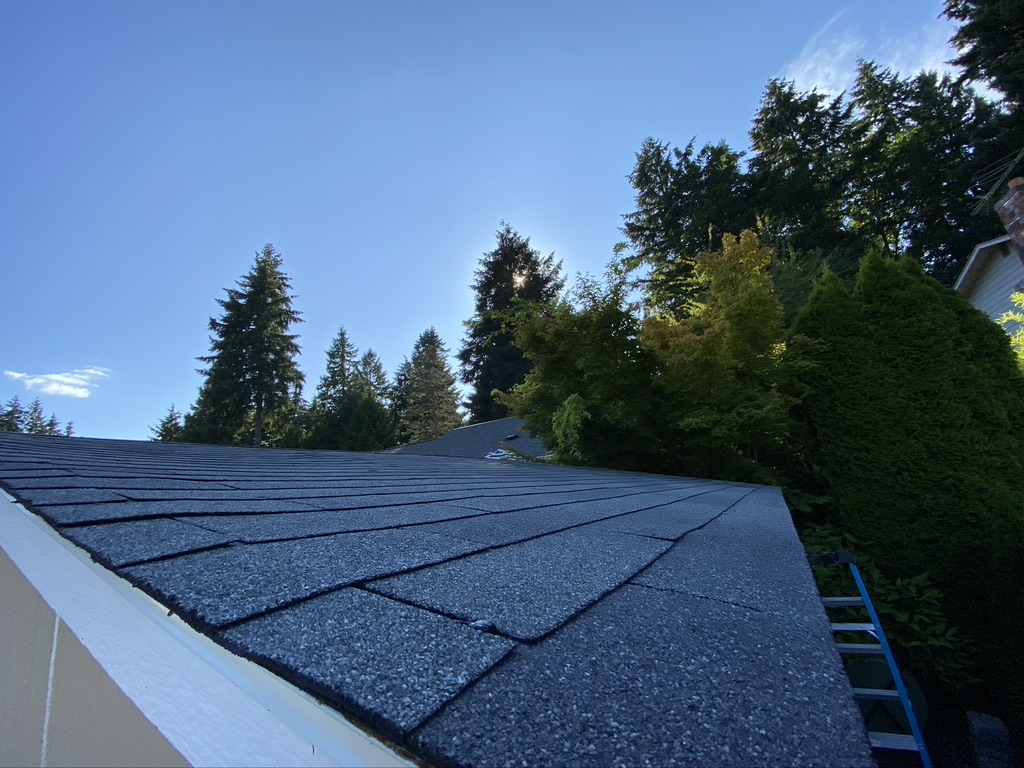
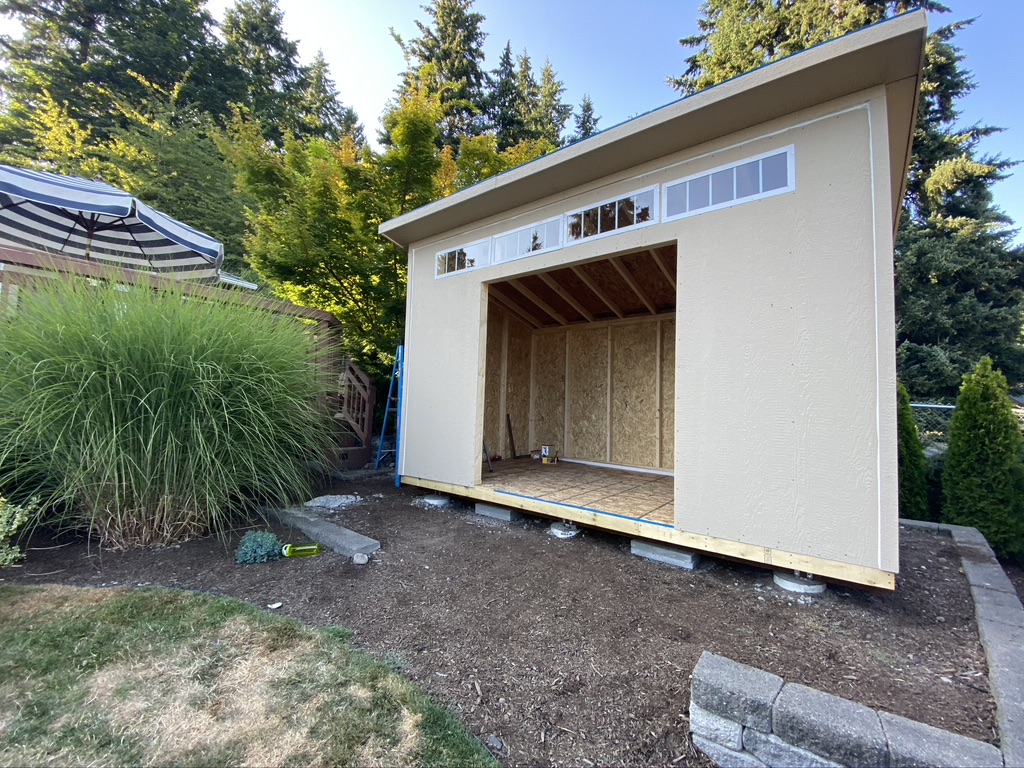
Shingling the roof was by far the worst part of the job. It was hot, my shoes were on fire, and the shingles are fairly heavy. I don’t have a nail gun, so all the puppies went on by hand.
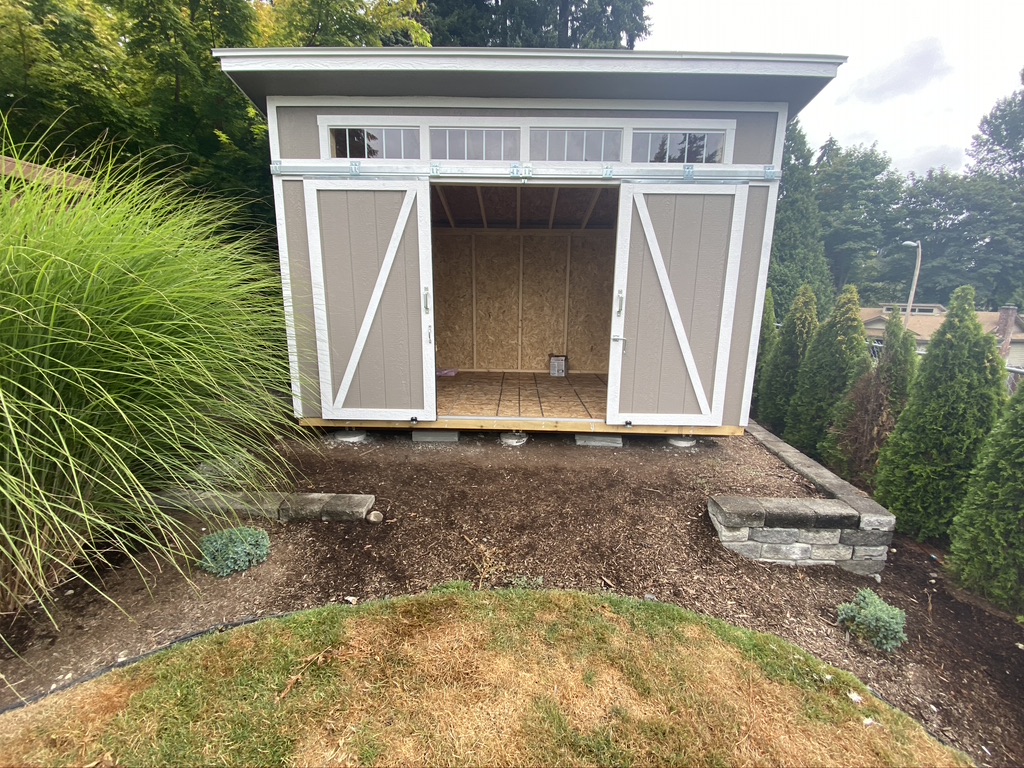

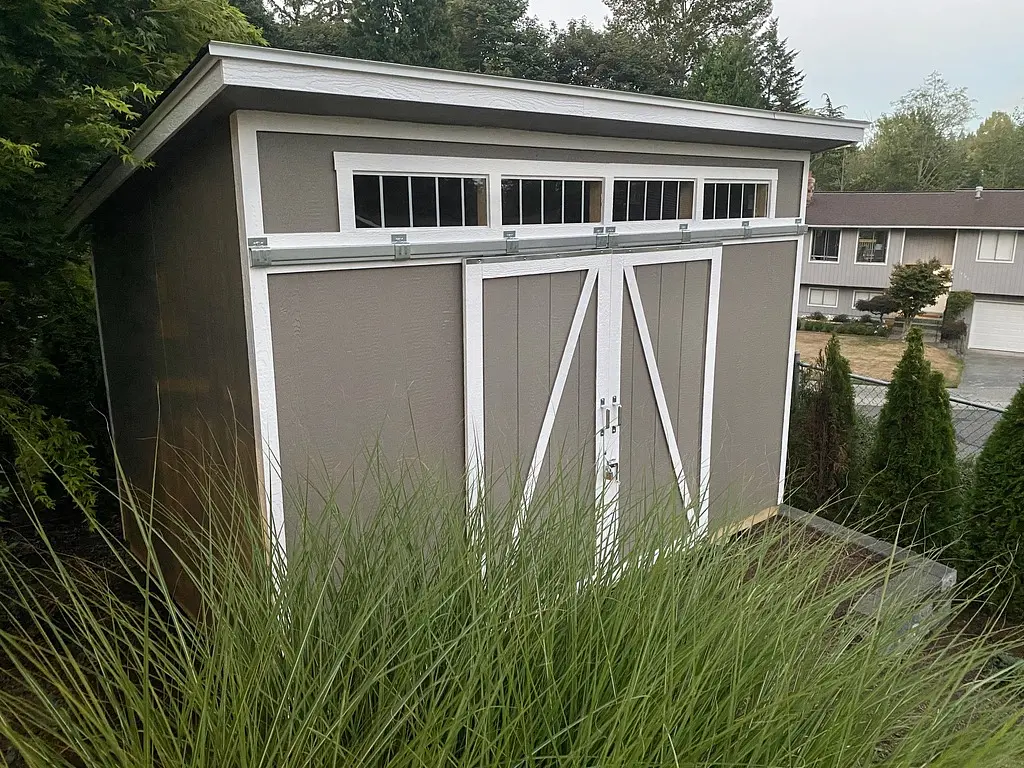
The final bits were hanging the doors and slapping some fresh paint on. It took me 6 days from beginning to end. Four of the days were full, with the other couple being less so.
I’m very pleased with the final product. The shed has been tested by the rain several times and everything seems to be fine. I’ll get around to building a ramp before the fall.
It was a fun project, but I’m glad to be going back to computer work if I can manage it while helping the kid adapt to remote kindergarten. Best of luck to all the parents out there, we’re going to need it.
If anyone is curious about this specific shed, it’s a 12′ x 8′ Yardline Santa Clara Storage Shed and I purchased it from Costco.